
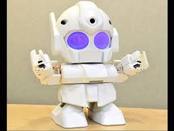
Giving eyes to our robotic projects is one of the most useful things to learn when planning to take the projects to the next level by remote accessing the RPi and getting feedback on location from the cameras. If you think about it it's the principle of how unmanned vehicles and drones are controlled. Therefore it's important to understand the basics prior to venture with face detection, motion triggering for security systems, multiple cameras circuit or night vision drones. A simple project like giving eyes to a robot toy like Rapiro shown in the picture can be expensive if not planned ahead. Bottom line, learning how to use cameras is a must with Rpi and the applications are just bound by our imagination and wallet.
So I will take your through my journey in the last couple days evaluating the two major options. In broader terms there are two main options available in the market you can either buy raspberry cameras or you can use webcams. I will comment on both on this blog and refer you to some useful Robo-links to compliment your journey; however this is not a tutorial on the subject.
Let's start with the raspberry pi cameras. The raspberry pi cameras are tiny in size and weigh. Many options available and they connect to a special port within the Rpi that is extremely delicate so be careful. It costs anywhere between $30-$40 which is high compared to the cost of an RPi is $35. Also considering most phones now a days have a powerful camera, I will say it's a decent option if you are looking for miniaturization. Making it work is extremely straight forward. Refer to this link for a step by step procedure: http://www.techradar.com/news/computing-components/peripherals/how-to-install-the-raspberry-pi-camera-module-1172034
The only tricky part was that when storing the pictures the file folders need to be public. This is easy to do, just access the folder in File Manager application in the Raspberry Pi, right click, select Properties, under the Permissions tab and make sure users have Read and Write access in case there are multiple users you have to deal with or if you get an error when storing your pictures. The second tricky part is the physical installation, you can refer to YouTube videos such as https://www.youtube.com/watch?v=GImeVqHQzsE, with a bit of patience and avoiding brute force it can be done. A guy like me prefers to ask someone to help with this delicate components. I am more into programming I believe is more abstract and mentally stimulating :). Now I am really getting off topic, my apologies.
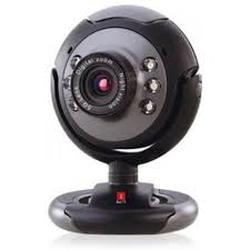
The second option is to use webcams. I personally like this option, you can find very cheap, small and sturdy options in the market. Installation is fairly straight forward but not without its challenges. It actually took me longer to figure it out. Please refer to the following tutorial for a very visual and clear way on how to set-up a webcam: http://www.instructables.com/id/Raspberry-Pi-remote-webcam/?ALLSTEPS.
There is a delay when streaming that is long enough to be noticeable, so if your project requires fine movement or your robot well being depends on reaction time or if you need higher resolution please go for the raspberry camera option instead. If you are looking to detect motion, get to see what your robot is seeing, web cameras are the way to go.
So I will take your through my journey in the last couple days evaluating the two major options. In broader terms there are two main options available in the market you can either buy raspberry cameras or you can use webcams. I will comment on both on this blog and refer you to some useful Robo-links to compliment your journey; however this is not a tutorial on the subject.
Let's start with the raspberry pi cameras. The raspberry pi cameras are tiny in size and weigh. Many options available and they connect to a special port within the Rpi that is extremely delicate so be careful. It costs anywhere between $30-$40 which is high compared to the cost of an RPi is $35. Also considering most phones now a days have a powerful camera, I will say it's a decent option if you are looking for miniaturization. Making it work is extremely straight forward. Refer to this link for a step by step procedure: http://www.techradar.com/news/computing-components/peripherals/how-to-install-the-raspberry-pi-camera-module-1172034
The only tricky part was that when storing the pictures the file folders need to be public. This is easy to do, just access the folder in File Manager application in the Raspberry Pi, right click, select Properties, under the Permissions tab and make sure users have Read and Write access in case there are multiple users you have to deal with or if you get an error when storing your pictures. The second tricky part is the physical installation, you can refer to YouTube videos such as https://www.youtube.com/watch?v=GImeVqHQzsE, with a bit of patience and avoiding brute force it can be done. A guy like me prefers to ask someone to help with this delicate components. I am more into programming I believe is more abstract and mentally stimulating :). Now I am really getting off topic, my apologies.
The second option is to use webcams. I personally like this option, you can find very cheap, small and sturdy options in the market. Installation is fairly straight forward but not without its challenges. It actually took me longer to figure it out. Please refer to the following tutorial for a very visual and clear way on how to set-up a webcam: http://www.instructables.com/id/Raspberry-Pi-remote-webcam/?ALLSTEPS.
There is a delay when streaming that is long enough to be noticeable, so if your project requires fine movement or your robot well being depends on reaction time or if you need higher resolution please go for the raspberry camera option instead. If you are looking to detect motion, get to see what your robot is seeing, web cameras are the way to go.
A couple challenges faced when installing the web cameras. First is finding the settings to modify in the nano editor. It's a lengthy file with lots of comments. Again be patient and I believe the file is worth reading, it will come handy later on when you need to play with the settings as well. The other challenge was setting up the ports. The instructions and examples either use 8080 or 8081. As there is a lot of things installed in my computer, this port was being accessed by other applications so doing a little research I changed my port to 4440. Ideally you want the webcam to stream video to an IP address where you can view it. Otherwise what's the point of setting up a web camera? To be honest I need to do more research on setting up ports to even give you a reference to look at. Let's suffice to say, it's not so easy to tinker around.
The other thing to consider is the web browser you are using along with the firewall settings. I have Norton antivirus installed in my computer as I had a nasty virus I had to get rid off a few weeks ago. It's very powerful but the thing is so nosy that it controls the browsers and firewalls so it's a pain to bypass. I installed Safari and it worked like a charm. Also I tested in my iPhone with no major issues again using Safari. I am sure there is a technical explanation and things that can be done. My not so elegant solution is to install Safari and be done with it.
One last good thing about the web cameras is that they use USB so physical installation is super easy.
Now in my next project I will challenge myself to have more than one web camera running and this time I want to rotate/tilt and zoom remotely with a servo and I would like to gut them to use the smallest configuration I can get away with. I wish all of you good luck with your projects. And welcome your comments and please feel free to share your experiences. Cheers.

 RSS Feed
